
Mixology feels like a bit of magic and chemistry blended together when you see someone whipping up eye-catching cocktails. If you’ve watched a bartender skillfully shaking a martini, stirring a negroni to that perfect chill, or muddling fresh herbs for a mojito, it’s easy to feel inspired to try these moves at home. Having some basic mixology techniques under your belt not only ups your bartending game, but it also makes for more flavorful and consistent drinks. I’m walking you through the essential moves: shaking, stirring, and muddling. With a few basics, your next cocktail can taste just as great as the ones you get out on the town.
The Core Techniques Every Home Bartender Should Know
Great mixology isn’t just about using fancy liquors or colorful mixers. It’s about treating each step with a bit of purpose. Getting comfortable with shaking, stirring, and muddling opens up a ton of classic and modern recipes you can enjoy or share with friends. Whether I’m hosting a laidback weekend or looking to impress at a dinner party, these basic techniques always come in handy.
Each technique changes the drink in a unique way, from chilling or diluting to extracting flavors. Even just paying attention to what tool and method you use can take a simple recipe and bring it to a whole new level. Understanding the difference between when you should shake or stir, and how muddling works, is really important for the best results in your glass. Not only does this help you make better drinks, but it also makes mixing cocktails feel more rewarding and fun.
Shaking: When and How to Shake Cocktails
Shaking isn’t just for drama (though it does look cool behind the bar). It’s a practical move for certain recipes, especially when the drink includes juices, cream, eggs, or anything that isn’t just spirits and liqueur. Shaking gets everything mixed up thoroughly, chills the drink, and adds a slight froth for extra appeal.
- When to Shake: I typically shake cocktails with citrus (like a whiskey sour or margarita), egg whites (hello, pisco sour), cream, or other dairy or milky ingredients. These don’t blend as easily with just a stir.
- How to Do It: Add the spirits, mixers, and ice to your shaker (a metal two-piece Boston shaker or a three-piece cobbler shaker works well). Fit the parts together tightly, hold with both hands, and shake with some energy. A solid shake usually lasts 10–15 seconds, which is long enough to hear the ice break up. Then, strain it into the chosen glass, usually over fresh ice.
Double-straining, where you use a fine mesh strainer after pouring from the shaker, is a trick I like for cocktails that include fresh fruit or herb bits. It keeps the drink smooth and residuefree.
Stirring: Why This Classic Move Still Matters
Stirring is what I reach for when making spiritforward cocktails—think martinis, manhattans, and negronis. These mixes are usually all booze, with maybe a dash of bitters or a bit of vermouth. There’s no juice or dairy to blend, so stirring is perfect.
- When to Stir: If your recipe includes only spirits (or spirits and modifiers like vermouth, amaro, sherry, bitters), stirring keeps the final drink clear and crisp. This preserves the silky texture and doesn’t add air or bubbles like shaking does.
- How to Do It: Using a mixing glass, add your spirits and plenty of ice. Insert a longhandled bar spoon and stir smoothly for about 30 seconds, letting the ice do the chilling and diluting. The key here is a gentle motion, with no splashing. Once it’s wellchilled, strain it into your glass.
Some folks swear by stirring 40 times in a circular motion for the perfect dilution. I usually just aim for a wellmixed, icycold drink that still stays nice and clear in the glass. If you want to step up your technique, try experimenting with different stirring speeds to see what changes in the texture and temperature of your cocktails.
Muddling: Unlocking Fresh Flavors
Muddling is the go-to for cocktails built on vibrant, fresh flavors, like mojitos, old fashioneds, or mint juleps. This simple step pulls out juices and essential oils from herbs, fruit, or sugar cubes, giving your cocktail an extra punch of taste you won’t get from syrups alone. It allows you to really make your own spin on a drink, especially if you try muddling in different fruits or herbs for a personal touch.
- When to Muddle: If your drink calls for fresh mint, basil, slices of citrus, or berries, you’ll want to muddle these at the bottom of the glass before adding liquid ingredients. It’s also common for drinks using sugar cubes that need a bit more help to dissolve.
- How to Do It: Start with the solid ingredients in the bottom of your mixing glass or shaker. Use a muddler—a chunky baton often made of wood or plastic—and press gently for herbs, just enough to release aroma and oils, but not so hard that it shreds everything into bits. For fruits, a firmer hand helps extract juice while still leaving some texture behind.
Overmuddling herbs like mint can release bitterness, so I make sure to work gently. With fruit, a bit more pressure gets the flavor going without creating a pulpy mess. Muddling properly really lets you set free those essential oils and flavors for maximum freshness.
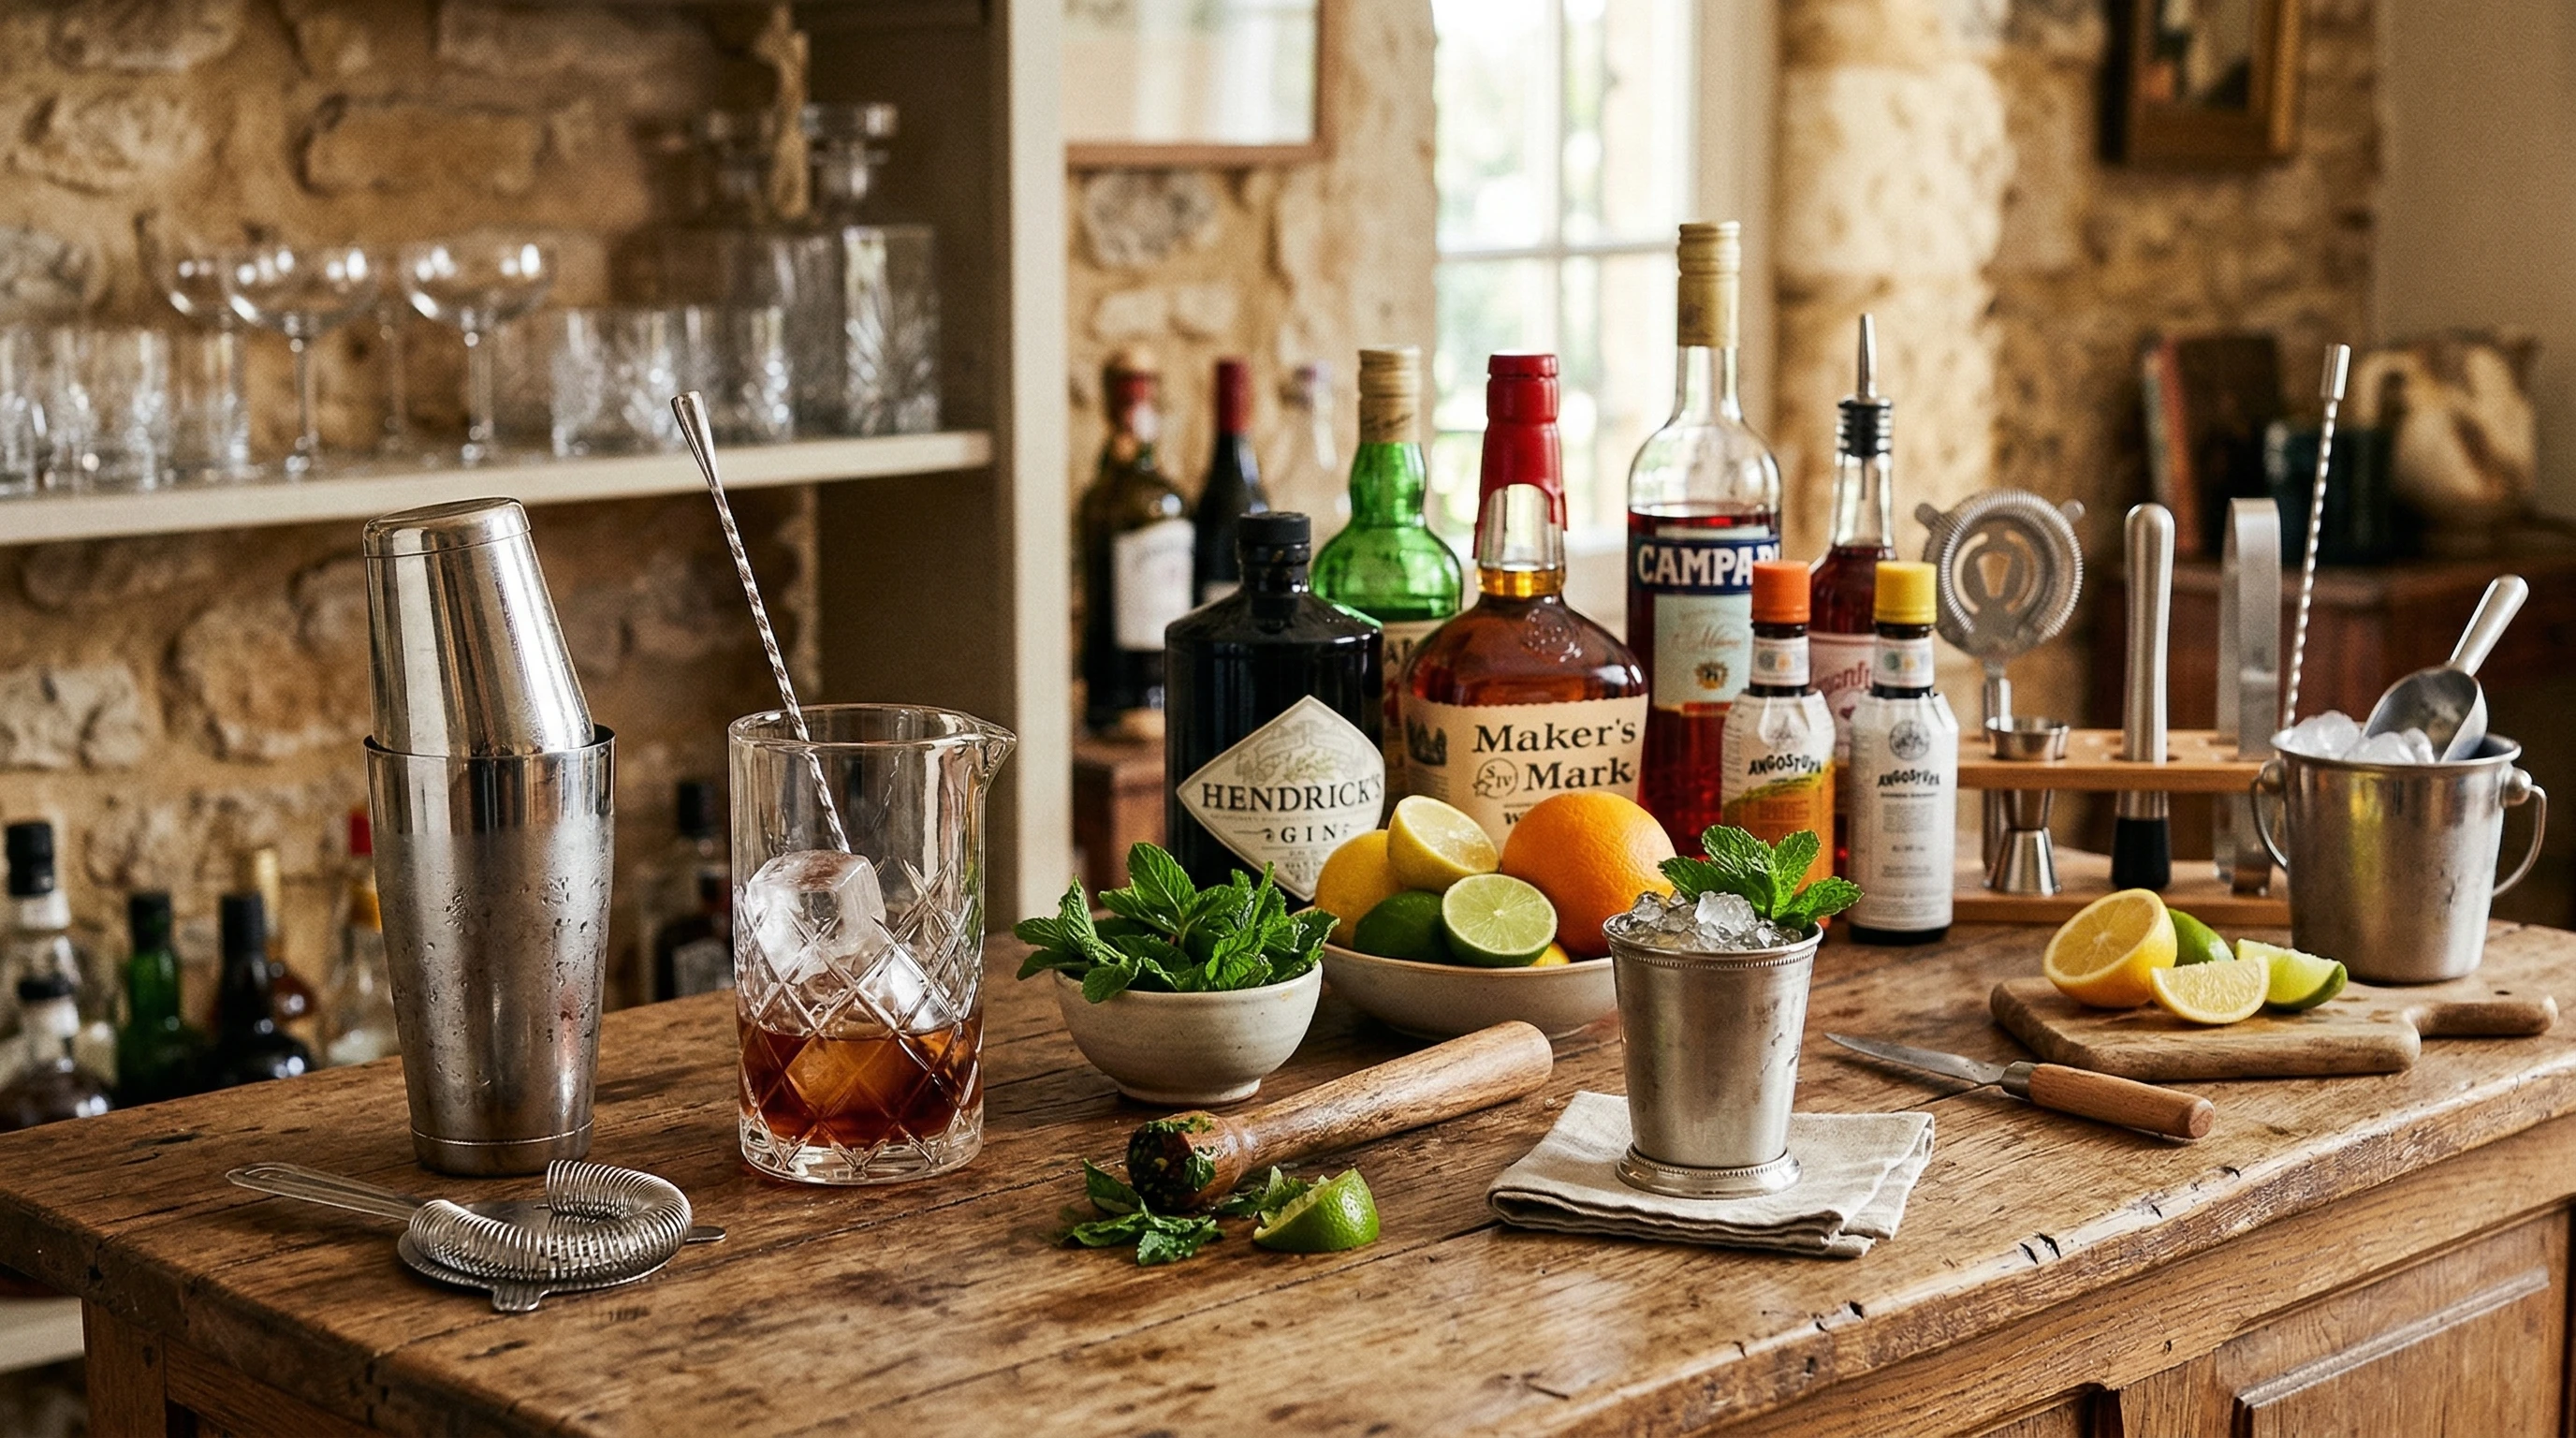
Essential Tools for Shaking, Stirring, and Muddling
You don’t always need pro equipment, but a few specialized tools help get the best out of your techniques. Here are a few items I recommend for every basic bar setup:
- Shaker: Either a Boston or cobbler shaker does the trick. Boston is two pieces (metal and glass or tin), while cobbler is the threepart classic with builtin strainer.
- Mixing Glass: Any heavy glass works for stirring, but a dedicated mixing glass gives more room to gently stir and looks nice on the counter.
- Bar Spoon: Long, spiraled handle helps stir smoothly and reach the bottom of the glass.
- Strainer: For pouring out the drink while keeping ice and solid bits behind—usually a Hawthorne or fine mesh strainer.
- Muddler: The sturdy stick for pressing herbs and fruits. Even the handle of a wooden spoon works in a pinch, but a real muddler gives more control.
- Jigger: For measuring liquids accurately. Consistency is big when it comes to mixing drinks you want to repeat.
Having these essentials around will make your cocktail making smoother and give you more confidence as you try new drinks. Don’t hesitate to look for affordable versions when first starting out.
Quick Tips for Next-Level Cocktails
Even with the basics down, a couple of quick tricks can help you confidently turn out better drinks. These are habits I’ve picked up from home bartending and watching pros:
- Chill your glassware before serving, especially for cocktails served up. This keeps drinks colder for longer.
- Use fresh ice. Old freezer ice can add weird flavors, so I like to use a new batch for mixing and serving.
- Don’t overfill your shaker or mixing glass. More room gives the ice a chance to move and do its job.
- Taste as you go. If you’re not sure about proportions, take a quick sip before straining to adjust sweetness or acidity.
- Clean your tools right after use, since getting sticky syrup out of your shaker later is never fun.
Paying attention to these details goes a long way toward improving your drinks. And if you keep practicing, you’ll quickly see a jump in your results.
Common Questions About Shaking, Stirring, and Muddling
It’s normal to have a few questions when you’re getting into a new hobby, and mixology is no exception. These are a few things I hear pretty often:
Question: What’s the real difference between shaking and stirring?
Answer: Shaking mixes ingredients, chills quickly, and adds a bit of air (and sometimes foam) to the drink. Stirring is gentler, mixing and cooling without messing with the clarity or texture.
Question: Can I muddle straight in the shaker, or do I need a separate glass?
Answer: Most recipes are fine with muddling right in the shaker before adding other ingredients. Some classic drinks, though, use the serving glass directly; for example, a traditional old fashioned is muddled directly in the short tumbler it’s served in.
Question: Do I need to buy all these tools to get started?
Answer: Not really. You can improvise with a mason jar for shaking, a big glass for stirring, and the back of a spoon for muddling. That said, having the proper tools eventually makes things quicker, easier, and often neater.
Mixology Techniques in Action: Classic Cocktails to Try at Home
Putting these techniques into practice is the best way to get comfortable. These drinks are perfect examples:
- Margarita (Shaken): Tequila, lime juice, orange liqueur—combine, shake hard with ice, and strain over fresh ice into a saltrimmed glass.
- Manhattan (Stirred): Rye whiskey, sweet vermouth, and a couple dashes of bitters; stir with ice till wellchilled, then strain into a coupe and garnish with a cherry.
- Mojito (Muddled): Muddle fresh mint and lime with sugar, add rum and ice, top with club soda, and stir gently.
Trying out these recipes helps you experience firsthand what each technique brings to the flavors and texture of a drink. Each method leaves its signature, from frothy shaken cocktails to the crystal clarity of stirred ones, and the lively aroma that a wellmuddled drink gives off.
Building Your Home Bartending Confidence
Learning how to shake, stir, and muddle isn’t just about following rules. I see it as experimenting and figuring out what suits your style best. These practical moves open up tons of drinks you can make, and every successful cocktail builds a bit more confidence for the next round. Don’t worry too much about perfection. Enjoy the process, tweak your approach as you go, and you’ll find your mixology groove in no time. Mixology, after all, is about having fun, socializing, and making moments special. So jump in, try out new recipes, and keep improving as you go—your skills (and your friends) will thank you.